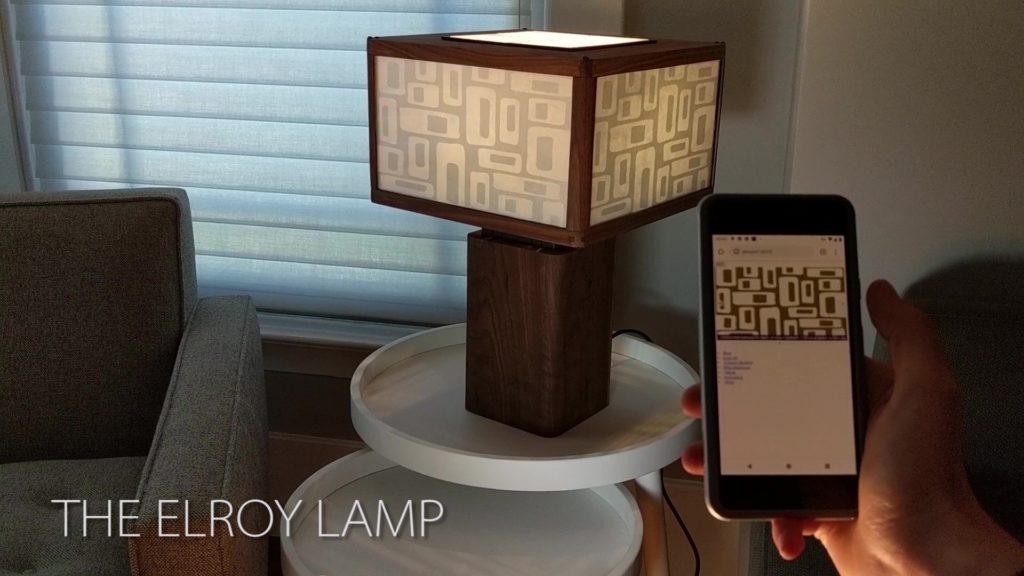
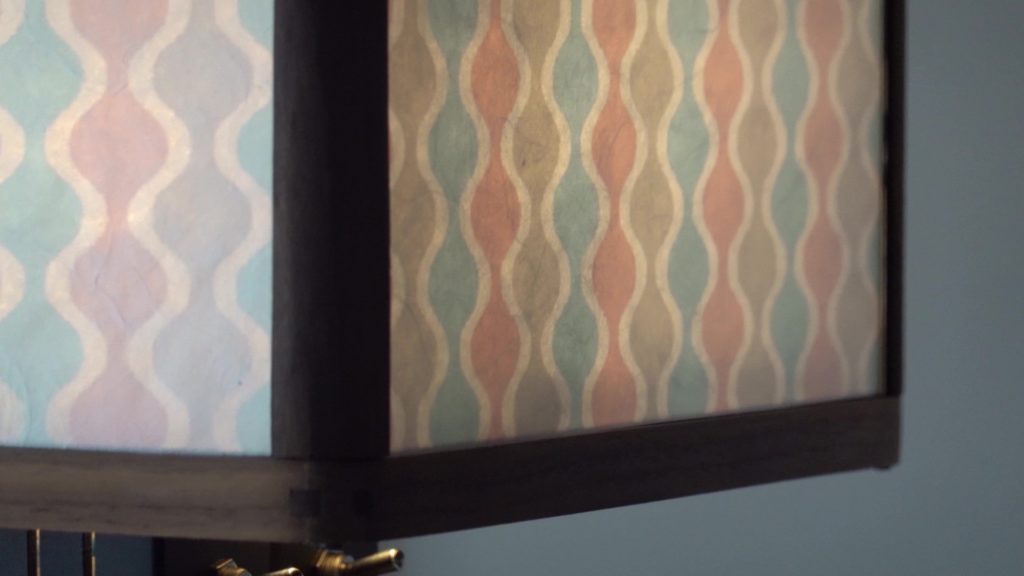
Elroy is a table lamp with a unique feature — the shade can dynamically change, at the swipe of a finger, to a new style or pattern to complement your mood, the time of day, or an event, all from your phone or web browser.
Elroy is a concept and personal DIY project. I’ll share some learnings and details on how I built it. These aren’t step-by-step instructions, but I hope they’ll be helpful to anyone that’s inspired to build their own design.
Overview
Elroy is essentially a computer with a 4-way display, backlit by a bright LED bulb. The four sides of the lamp shade are made from translucent LCD displays, and acrylic and paper diffusion layers. The light source is a very bright 35W LED bulb. The displays are driven by a single board computer running Linux and custom software to display and manage images. The lamp is controllable over wifi via a simple web app.
Translucent LCDs
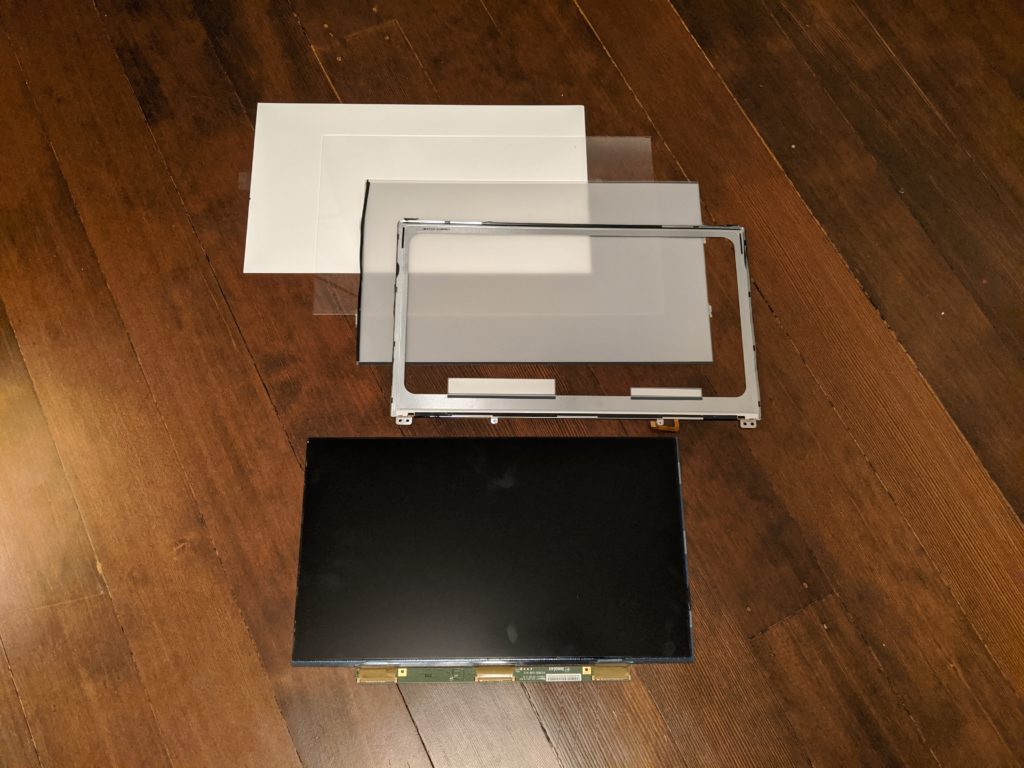
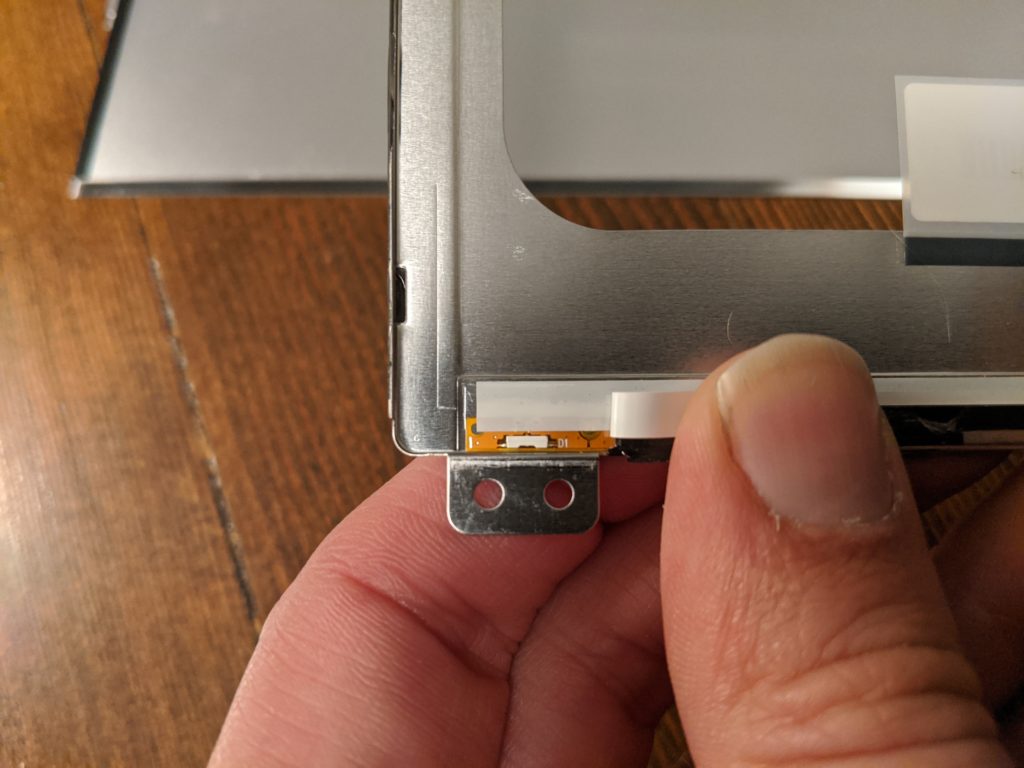
I salvaged some 13” LCD displays from old laptops and found additional matching displays on ebay. I disassembled each display, removing the frame, backing layer, diffusion film, and backlight. This took some practice to get right. The LCD glass is quite fragile. I broke 2 panels during disassembly and had to find replacements. The trick is to remove the electrical tape that holds the display together without flexing the LCD glass so much that it cracks.
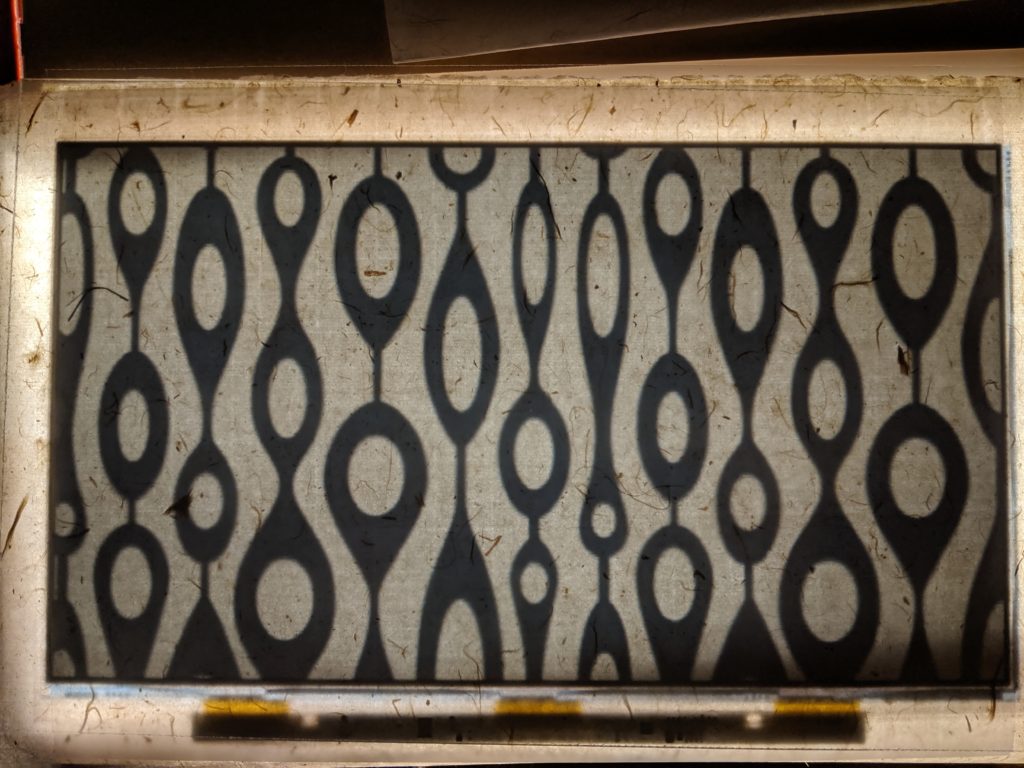
The remaining LCD panel is translucent: LCD displays are a sandwich of transparent glass embedded with liquid crystals and tiny transistors, surrounded by layers of polarizing film. In the photo below, I wrote a message on a piece of letter paper, placed it on a clear piece of acrylic, on top of a bright backlight. You can see the LCD display on the right is translucent, but similar to a pair of sunglasses, the polarizing film only permits a fraction of the backlight to emit through the panel.
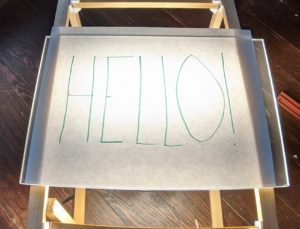
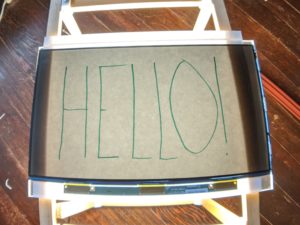
Polarizing film is necessary for the function of an LCD display.
Lamp Light & Diffusion
Given the low amount of light emitted through the display, to create a sufficiently bright lamp, a very bright light source is needed. Also, though an LCD display is typically backlit by a light with a cold color temperature (around 5000K), lamp light is typically a warm color temperature (like 2700K). So the ideal bulb must be bright and warm.
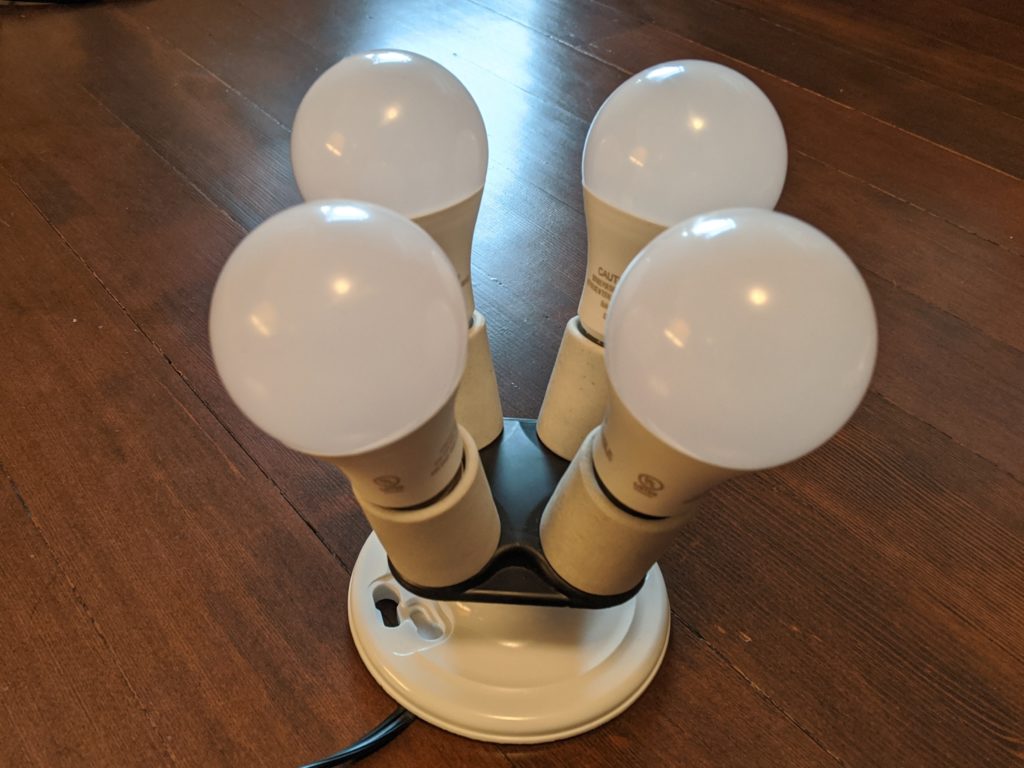
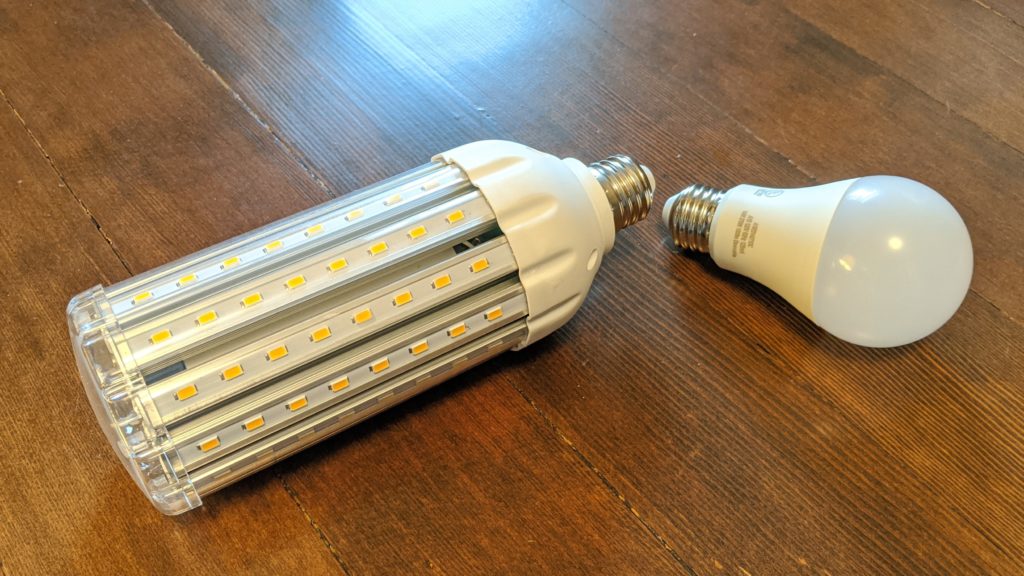
I experimented with multi-bulb arrays, and different bulb options, but settled on this 35W (300W equiv) LED bulb. This bulb is giant and takes up quite a bit of space within the shade. It’s bright enough that it shouldn’t be directly exposed — it would be uncomfortable (maybe dangerous?) to look at directly.
Next, without some work, the light from the bulb, when viewed through the LCD panels, would be a harsh point-light concentrated in the center. I wanted to diffuse the light evenly across the surface and produce a textured, fabric-like aesthetic. I experimented with different acrylic and polycarbonate sheets and paper materials.
Here’s one experiment result I really liked, but didn’t end up using. This is mulberry paper, which has a unique texture that’s simultaneously woody and linen-like, has nice diffusion properties, and transmits a lot of light. This looked great with black and white patterns and particularly complemented a Japanese lantern aesthetic. I felt like the large and non-uniform fibers didn’t work as well with a diverse set of patterns.
I found the best combination was this sandwich (starting from the inside):
- Frosted acrylic 1/8″ 90% emission (film facing out)
- Vellum tracing paper
- LCD
- Rice paper
- Clear anti-glare polycarbonate 3/32”
The acrylic and polycarbonate sheets also add some structure to protect the LCD glass from flexing and breaking. I wrapped the edges of each sandwich in acetate cloth electrical tape to keep the sheets together.
Controlling
I needed a small SBC (single-board computer), capable of driving 4 displays. I happened to have an Nvidia Jetson Nano, which has DisplayPort 1.2 output with support for MST (multi-stream transport), which means it’s able to drive multiple displays. The Jetson Nano is a powerful, tiny computer that operates on 5V power and can run a standard Linux distribution like Ubuntu.
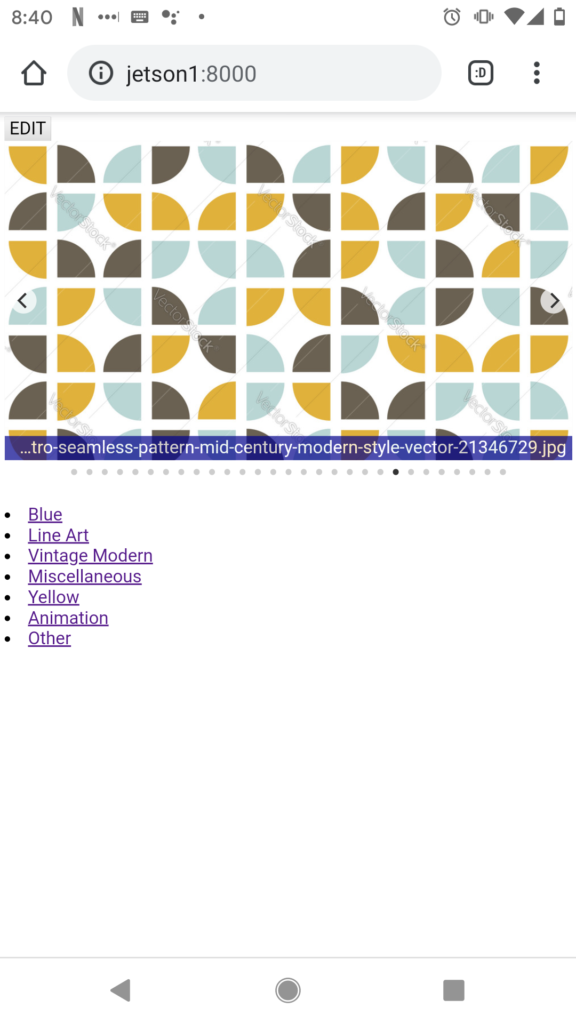
I wrote some custom software based on Pygame to display images, with a simple web app and server to give me control over the images.
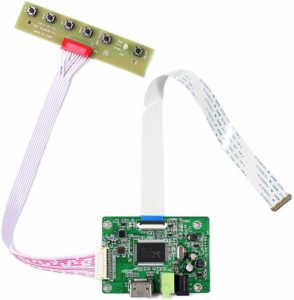
The LCD panels take EDP (Embedded DisplayPort) video input. Each display required an adapter from DisplayPort to EDP. These adapters are bulky and have a lot of functionality I didn’t actually need, like 12V power and brightness control for a backlight (which I removed from each panel) and a control interface for display settings. I also needed an MST Hub to break out 4 DP ports from the 1 DP port on the Nvidia Jetson Nano. This configuration is something I think I could make cheaper and more compact in a future revision, but it worked great for this concept.
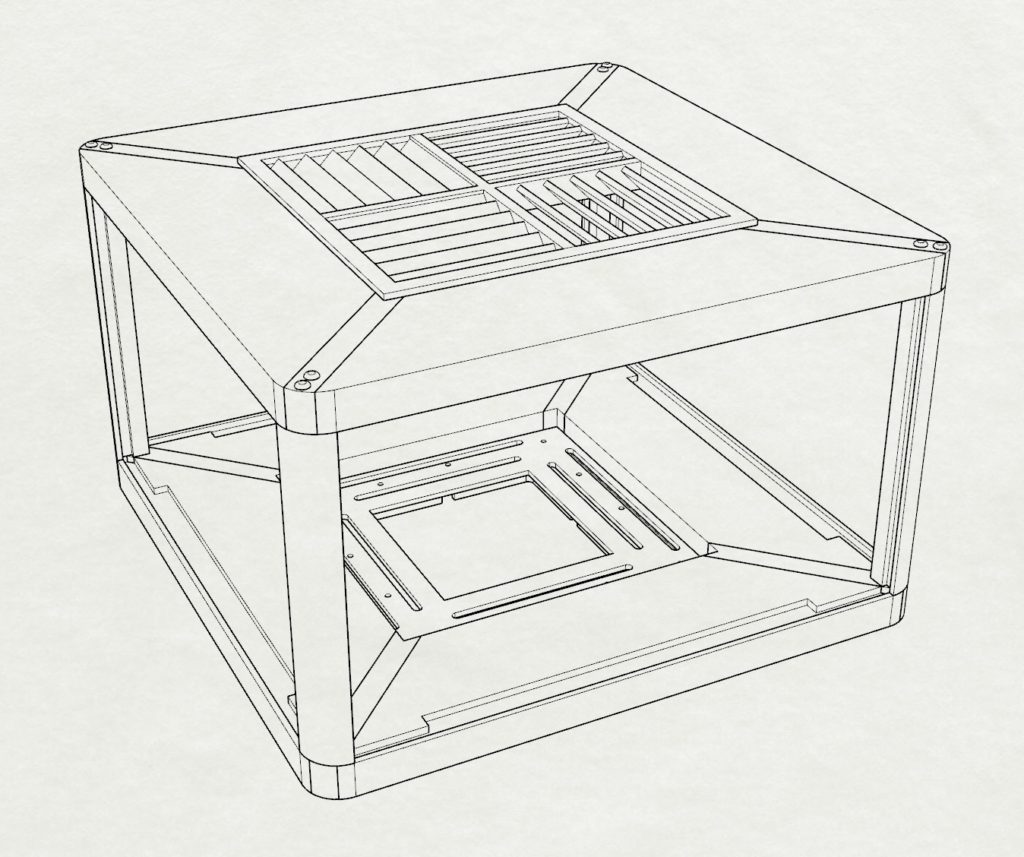
Woodwork
I designed the lamp structure in Rhino3D and chose to make wooden parts from walnut. This makes the shade rather heavy, but the lamp is stable with the walnut base.
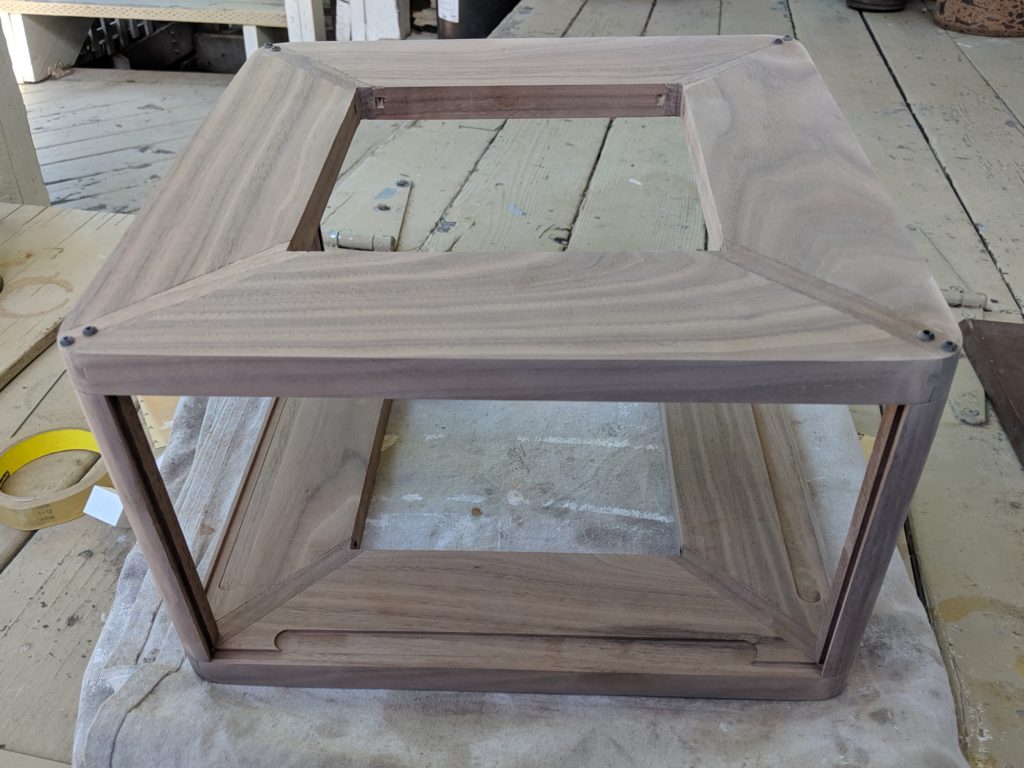
I cut all parts for the shade and base, then shaped them on a router table. I’m not an experienced woodworker, but this came together pretty easily. I had an adventure making tongue-and-groove joints for the first time. This is the 3rd time I’ve used walnut for a project and I always like the result.
The side-edges of the frame have brass threaded inserts that enable the top and bottom to attach via M2 machine screws.
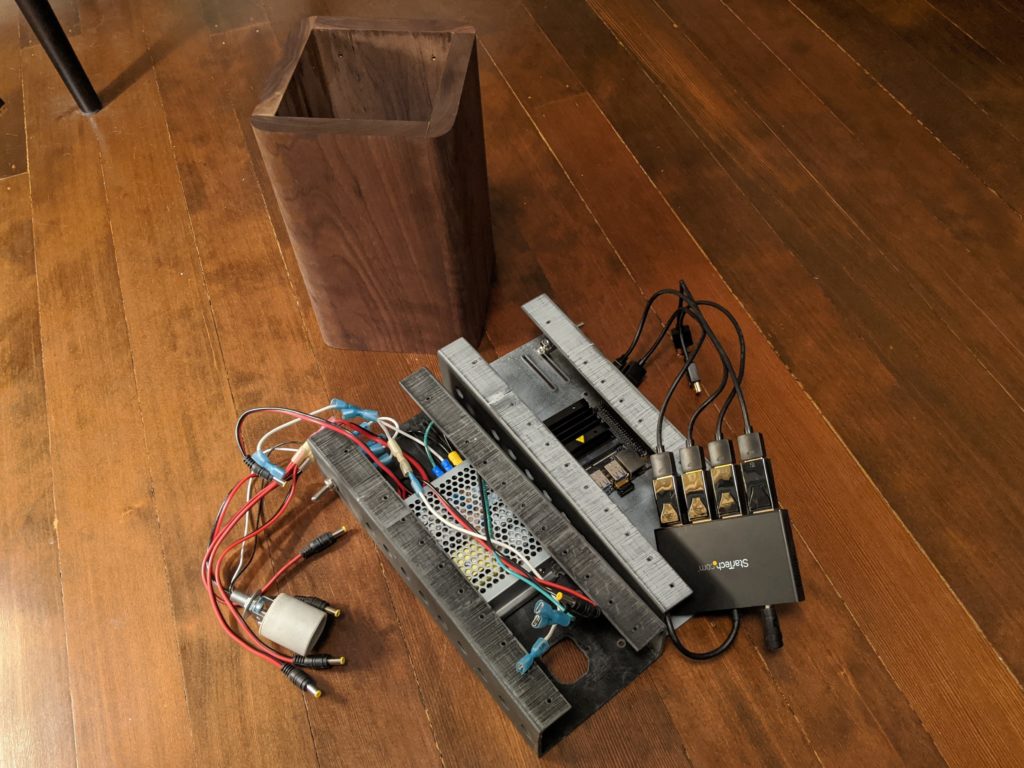
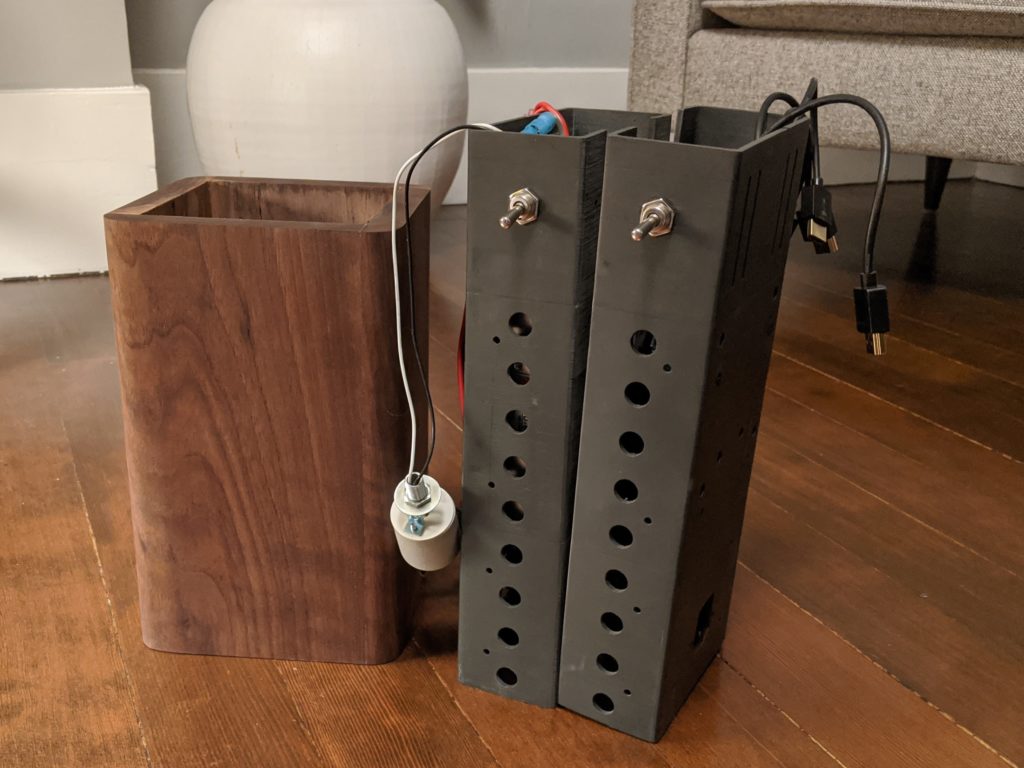
3D Printed Parts
Most of the electronic components, including the power supply, SBC, MST Hub, switches, and wiring are mounted in a 4.5” square 3D printed “sleeve” that fits inside the walnut base. There is also a vented platform that connects the sleeve to the bottom of the shade.
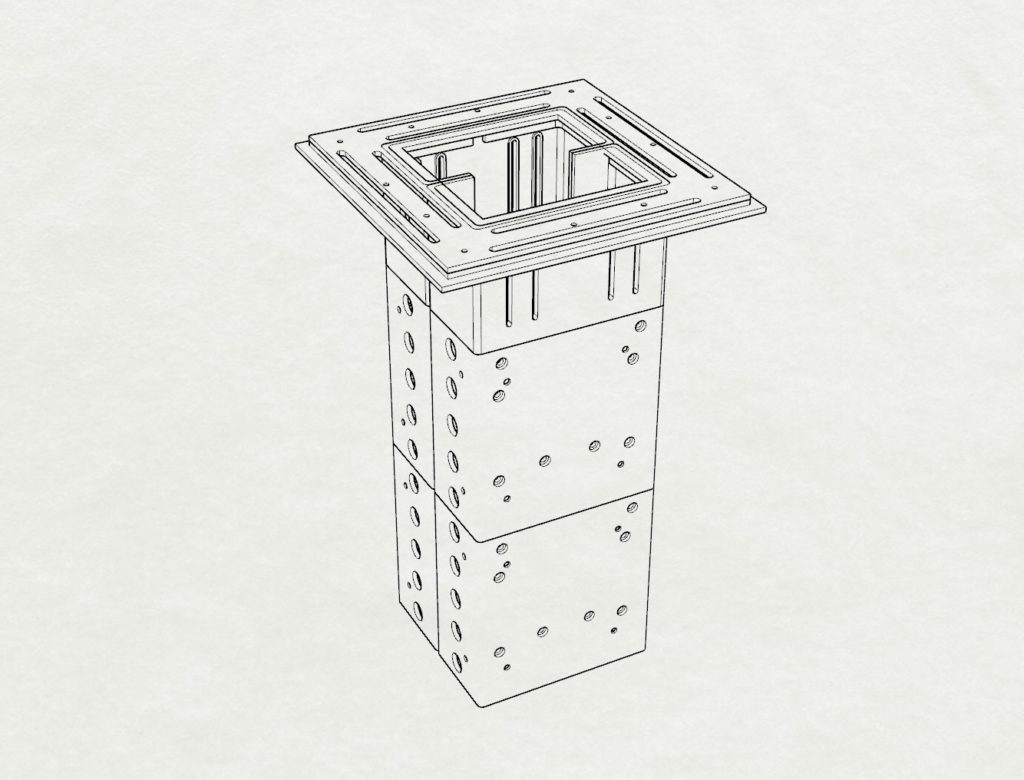
If I were building this lamp for production … or if I had access to the right tools, I’d want to make the sleeve and platform out of sheet metal to improve heat dissipation.
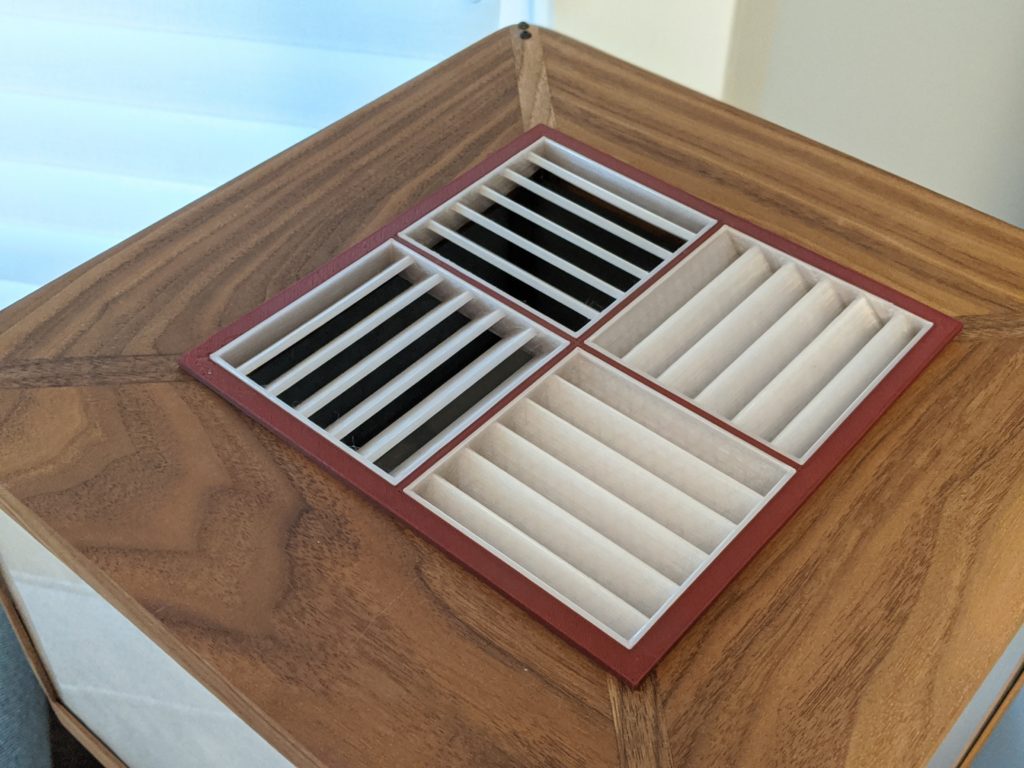
On top of the shade, I added a louvered cover. This enables the shade to emit additional light from the top, while obscuring the bulb, which is too bright to look at directly. This also permits heat to escape. I printed these parts out of translucent PETG, which has a higher plasticization temperature than some other common 3D printing filament materials. This isn’t strictly necessary because the surface temperature of the bulb doesn’t really get that hot. Even after hours of continuous use, the temperate is <130 degrees Fahrenheit.
Making it better
This lamp is mostly a proof of concept, but it works and looks good enough that I plan to keep it and use it. If I make another, I have a few ideas for improvement.
- Sheet metal. Replace the 3D printed sleeve and vented platform with sheet metal to help dissipate heat.
- Replace the DisplayPort MST hub and adapters. These take up a lot of space and add significant expense (~$250 for the hub and 4 adapters). One theoretical alternative is a DisplayLink adapter based on the DL-4100, which would drive displays over USB and support EDP. I haven’t been able to find such a device on the market yet. Another option to drive displays from USB3 would be to use an SBC with Displayport Alt Mode. I would still need to adapt Displayport to eDP. Adapter boards that do this are bulky and have a lot of components because they provide power and control to the backlight. Since I’m not using a backlight, I could make a simpler adapter that just maps pins for the different connectors.
- Finally, reconsider the closed frame design. Elroy’s shade is basically a closed box. I made this choice to obscure the bulb and hide some electronic components like the EDP ribbon cables and adapters. An open frame design might be possible. One idea is to backlight the panels with edge lighting so I can reduce or eliminate the high wattage bulb.
BOM
Display
- 4 X 13.3” LCD Display. (1366 x 768)
- 4 X HDMI Controller for M133NWN1 (1366 x 768, 30 Pin EDP)
- (Note these adapters take HDMI input rather than DisplayPort, so we need to convert DP>HDMI)
- 4 X DisplayPort to HDMI Cable (12”)
- 1 X StarTech 4-Port MST Hub
SBC
- 1 X Nvidia Jetson Nano w/ SD Card
DC Power
Lights
- 1 x 35W (300w equiv) LED Bulb
- 1 X Ceramic E26 Socket
Diffusion
- 1 X Yasutomo Sulphite Pulp Unryu Paper Roll, Cut
- 4 x Sheets, vellum paper
- 4 X Frosted Acrylic 11 7/8″ X 6 7/8″, 1/8″, “90%”
- 4 X Clear, anti-glare Polycarbonate, 11 7/8″ X 6 7/8″, 3/32”
Other
This really looks remarkable. Nice work!!
A minor detail I’m curious about… How did you address multiple displays with Pygame?
Many thanks,
Chris
I like the walnut construction; if only the corncob lamp in the middle were made of the same stuff, this is the sort of thing one should rely on (maybe trim the tree, though) to prevent major disruptive 60′ tree failure from causing loss of life. (That touch control on the party lights was starting to draw a bit much…)
This also looks like a fun reading lamp in that you can just put the reading on the lamp via ethernet or whatever. That’s more or less what I want to do (maybe interleaving book holders and frames with pdfs (and maybe, pan/zoom/hold controls, or AR based controls.) So maybe I’d want a USB3 hosted nvidia-based device with Embedded DisplayPort out? What’s that like then? (Any ideas pls?)
Nice work! Can you post the source of these shapes which are displayed?